Making your baby’s food is actually a simple process. ? My Dad made homemade baby food purees for me.
So, when it came time to introduce solids to my son, I had always planned on making homemade food for him.
My Dad talks about how easy and enjoyable the DIY baby food-making process was… So I went into it very optimistic…
And, believe it or not, it was super simple.

This post contains affiliate links. I may earn a small commission if you purchase something through one of these links. As an Amazon Associate, I earn from qualifying purchases. Thank you for the support!
Want the benefits of homemade baby food (variety of food, texture, ingredients, spices, and clean organic ingredients) but don’t have the time to make it yourself? Companies like Little Spoon will do all the work for you and send homemade baby food to your door.
Advantages of Homemade Baby Food
By making your baby food with fresh fruit and vegetables, you know the ingredients and can take steps to preserve as many nutrients as possible.
In general, pre-made baby food costs about $0.25 per oz.
On the other hand, fresh produce costs around $0.06 per oz.
So, if your baby eats 6 ounces of food every day, you will spend on average:
- $547.50 on commercial baby food
- Or $131.40 on homemade baby food
That savings is $416.10 per year (per baby!).
Which Foods To Give To Baby First
While the CDC does not recommend the specific fruits and vegetables you should give your baby, they advise that you offer pureed foods that are very smooth in texture.
✅ My step-by-step guide will show you exactly how to achieve this smooth texture for fruit and vegetable purees.
When you discuss starting solid foods with your pediatrician, determine which foods they recommend starting with and how often to give them.
For example, my pediatrician recommended starting with baby cereal (oats or rice) mixed with some breast milk or formula at four months of age. We started solids so early because my son had reflux, and our pediatrician thought the addition of solid foods would help ease his symptoms. And it did!
At his six-month appointment, we discussed introducing new foods with the pediatrician. Before long, we were in the full swing of solid foods and even started baby-led weaning (BLW).
Pro Tip: As your little one is starting solids, think of bibs that will grow to meet their needs (especially if you’re thinking of BLW down the road).

What Not To Feed Your Baby
? Some foods are not safe for babies. Foods that are not safe to give to babies:
- Honey
- Cow’s milk
- Choking hazards like:
- Nuts
- Seeds
- Raisins
- Hard candy
- Grapes
- Hard raw vegetables
- Popcorn
- Peanut butter*
- Hotdogs
- And other cylindrical-shaped foods
*Peanut butter can be safely given to babies under the guidance of your pediatrician (because peanuts are a common allergen) as long as it is spread extremely thin (think a pea-sized amount spread on a quarter piece of toast).
The Difference Between Stage 1, 2, And 3 Baby Foods
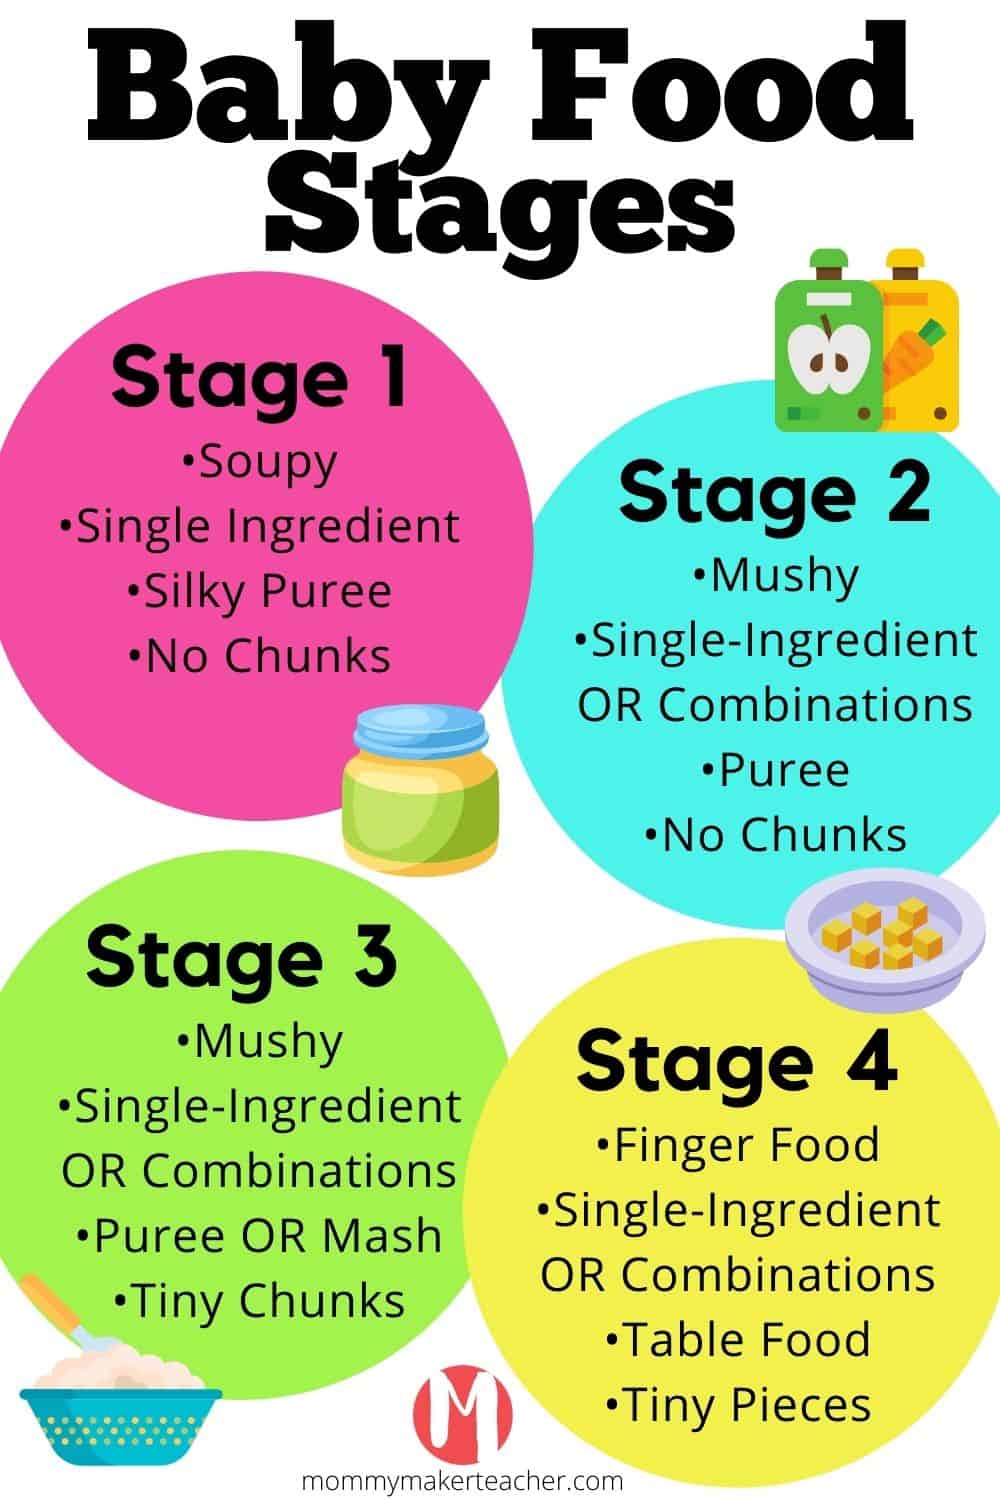
Stages 1, 2, and 3 (and some brands even have 4) refer to the number of ingredients, texture, and consistency of baby foods. Baby food stages are not universal. Different brands label their products differently.
Usually, these brands also define what their labels mean and the approximate age group they are targeting.
Generally, here are the differences between the stages:
- Stage 1 Baby Food: Single-ingredient. Pureed to a silky consistency. Soupy: drips off a spoon. No chunks. Stage 1 baby food is best for babies just starting solids (around six months).
- Stage 2 Baby Food: Single ingredient or combination of ingredients. Pureed, strained or mashed with a thicker consistency than Stage 1. Mushy: cannot be picked up with a fork but doesn’t drip off the spoon. No chunks. Stage 2 baby food is best for babies who have mastered Stage 1 (around 7-8 months).
- Stage 3 Baby Food: Single ingredient or combination of ingredients. Mashed. Mushy: cannot be picked up with a fork but doesn’t drip off the spoon. These are extremely small chunks for the baby to gum in their mouth. Stage 3 baby food is for babies who have mastered Stage 2 (around 9-12 months).
- Stage 4 Baby Food: Single ingredient or combination of ingredients. Finger foods. Table food is cut into small pieces to reduce the risk of choking. Stage 4 baby food is best for older babies who have mastered stage 3 baby food and are comfortable chewing small chunks (12 months and older). Even if your baby does not have any teeth, they can start to ‘chew’ soft chunks with their gums. Start them off with lumpy bananas, avocados, and mashed potatoes.
Step-By-Step: How To Make Baby Food Mashes And Purees
I learned everything I know about making baby food from my Dad.
The hardest parts for me were having a clean kitchen to avoid contaminants and storing the food.
I will give you extra tips and tricks to help with these steps from what I learned along the way.
**You will note that I have not included recipes for Stage 1, 2, or 3 meat in this guide. I chose baby-led weaning for introducing meat.
1. Start With A Clean Environment
Food safety is a super important key when you cook food for your baby. The more sterile the environment, the fewer chances of contaminating the food with harmful bacteria.
Clean all work surfaces you will be using to prepare the food.
Pro Tip: Make baby food in batches. I would make a 1 to 2-month supply of several different foods all at once and then store them in the freezer. I did this every few weeks so that I wasn’t constantly preparing my kitchen.
2. Decide On Whether To Boil, Steam, Roast Your Produce, Or Keep It Raw
In many cases, this is a personal decision.
Boiling
Pro: It is the easiest method, as you drop everything in boiling water. It isn’t easy to burn or overcook your ingredients using this method.
Con: Some of the nutrients might be lost in the boiling process.
Steaming
Pro: Just like boiling, it isn’t easy to burn anything with a steamer! You retain more nutrients.
Con: It takes a LONG time to steam fruits and vegetables.
Roasting
Pro: Like steaming, you won’t lose any of the nutrients.
Con: You can easily char or burn your ingredients, leaving an acrid taste that babies do not like.
Leaving Your Produce Raw
Soft foods easily mashed, like ripe bananas or ripe avocados, can be blended and strained raw.
Soft fruits and veggies with high water content, like cucumbers, melons, and berries, can also be blended and strained raw.
As long as you can achieve the stage 1 texture and consistency (see above), you do not need to cook your produce.
Note: raw produce is typically harder for little tummies to digest.
Pros: It’s much faster to prep these baby foods
Cons: You will likely need to run everything through a strainer at least once to eliminate ALL the chunks. Raw foods also tend to be harder on a baby’s stomach. Aim to introduce raw foods sparingly.
3. Have All Of Your Equipment Ready
Making baby food (especially if you make it in big batches) requires a lot of equipment.
Having everything ready will allow you to make the food and store it quickly to keep it fresh.
You will need:
- A colander
- A peeler
- A knife
- A cutting board
- A pot to boil water and a steamer insert (optional) or a baking sheet
- A blender or food processor
- A strainer (optional)
- Ice cube trays (optional)
- Storage containers (see more options below)

Making DIY Homemade Baby Food: Step-By-Step Tutorial
1. Wash and peel the carrots.

2. Roast until fork tender. Then, move to step 4.

OR
2. Chop the carrots into chunks that are about the same size.
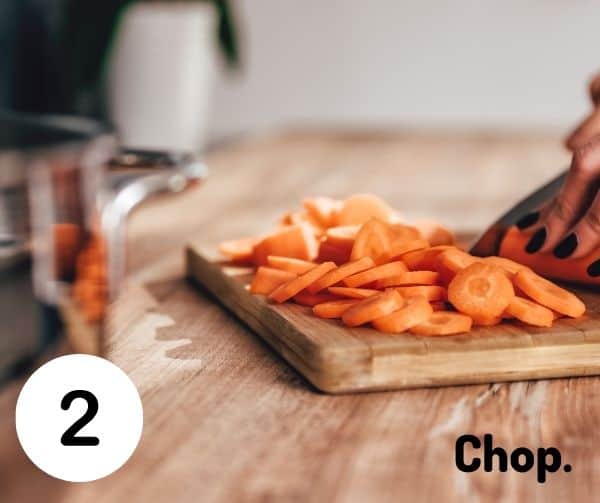
Pro Tip: smaller chunks take longer to cut but cook faster. Larger chunks are faster to cut but take longer to cook.
3. Boil or steam until fork tender (meaning you can easily stick a fork into the carrot with little or no pressure). If you are leaving your produce raw, skip this step.

4. Blend. Using a blender, immersion blender, or food processor, blend the chunks.

Note: you could also use a ricer (potato masher) or a food mill to puree your baby’s food, but it might be too thick and chunky in texture. Ricers and food mills are better for stage 2 and 3 baby food.
Check for consistency.
If it meets a stage 1 baby food (soupy, silky, no chunks), CONGRATS! You are done, and you have made your homemade puree for your baby! Move on to step 5 for storage.
If your puree is too thick, add some breast milk, formula, or a small amount of bottled water little by little to thin it down.
Pro-Tip: My Dad always recommended erring on the side of a little thicker than a little thinner. Because you can always add a little more breastmilk, formula, or bottled water before you serve it, it is more difficult to thicken baby food that is too soupy.
If your puree is chunky or has seeds (from berries, for example), run it through a mesh strainer for consistency.
How To Keep And Store Your Baby Food
5. Store in single-serve airtight containers.

Fresh, homemade baby food will last in the fridge for 48 hours.
If you have made more food than your baby eats in 48 hours, you must freeze it.
6. Spoon the puree into ice cube trays or freezer-safe single-serving containers.

The best way to freeze baby food is to put it in a clean ice cube tray. Then you have single-serving 1-1.5 oz cubes that you can heat as needed. Baby food will last up to 3 months in the freezer when properly stored.
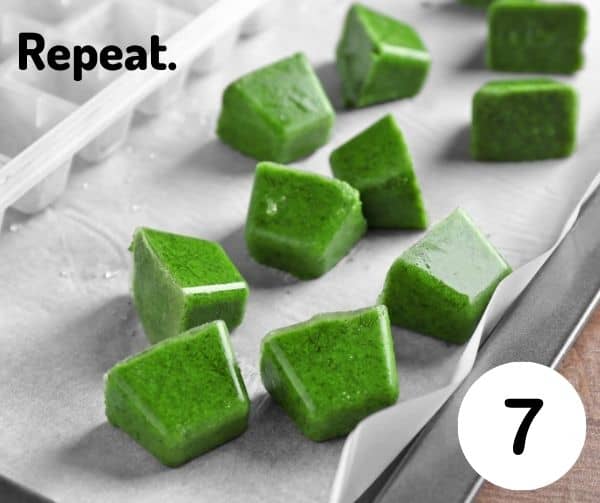
7. Once frozen, remove the ice cubes and store them.
Use single-serving freezer-safe jars, freezer-safe reusable bags, or regular freezer-safe Ziploc bags. Make sure to write the ingredient(s) and the date that it was prepared on each. Discard any unused homemade baby food after 3 months.
Pro Tip: When homemade baby food is frozen, it is very common for ice crystals to form on the surface. This is just water content. It is not freezer burnt.
15 Easy Baby Food Recipes
Remember, stage 1 baby food is only one ingredient.
When your baby is ready to move on to stage 2 baby food, they are ready for mixtures and combinations of ingredients.
Pro Tip: I like to make and freeze all my ingredients separately into ice cubes and then defrost and mix combinations when ready to serve. I learned this the HARD way by making a huge batch of apple-carrot puree, only to find out my son refused to eat anything with carrots in it!!
Popular Fruit Puree Combinations
Mix one tablespoon or one ice cube of each ingredient.
Apple + Blueberry
Banana + Strawberry
Kiwi + Mango
Peach + Cherry
Pear + Plum
Popular Vegetable-Only Baby Food Combinations
Mix one tablespoon or one ice cube of each ingredient.
Broccoli + Peas
Sweet potatoes + Carrot
Pumpkin + Lentils
Purple Potato + Black Beans
Eggplant + Green Beans
Popular Fruit And Vegetable Baby Food Combinations
Mix one tablespoon or one ice cube of each ingredient together.
Apple + Carrots
Spinach + Blueberries
Beats + Strawberries (make sure you have a stain-proof bib for this one!)
Sweet Potato + Pear
Butternut Squash + Peach
Spices To Add To Homemade Baby Food Recipes

Adding spices is a great way to introduce new flavors to your baby and prepare them to eat the same meals as the family when they are older.
DO NOT add sugar or salt to your homemade stage 1, 2, or 3 baby food. They are unhealthy for your baby and do not provide nutritional value.
It is important to add spices that are aromatic and are not spicy. Giving your baby spicy food could lead to burning of the throat, lips, stomach, and eyes (if touched). This will be painful and lead to an unhealthy fear of food.
Take this advice from someone who was accidentally given a spicy sauce as a baby and refused to eat any sauce- ketchup included- until well into her 20s.
Pro Tip: When adding aromatic spices to your DIY homemade baby food, try adding the spice to a single-ingredient puree before adding it to combinations. This will help you determine if it is the spice that they don’t like or the combination of ingredients.
Aromatic Spices To Add To Baby Food
Aromatic spices are a great idea to get a baby’s taste buds used to all different flavors. You can develop your baby food recipes by taking your favorite puree or mash and adding a bit of spice.
Add a tiny pinch of ONE spice to your baby’s food before heating and serving. Most spices do not taste good raw, so avoid adding raw spices to cold purees.
- Basil
- Cardamom
- Cinnamon
- Coriander
- Cumin
- Curry*
- Mint
- Nutmeg
- Oregano
- Smoked paprika**
- Rosemary
- Turmeric
*You can find mild curry powders but always try the curry for yourself to taste the spice level. Do not trust the label even if it says “mild.” You could also make your curry powder by mixing equal parts cumin, turmeric, and coriander.
**Smoked paprika has a smoky, earthy flavor. Make sure you check the label for smoked paprika. Other paprika (like Spanish Paprika) are VERY SPICY. Like with the curry powder, always check the spice level before giving it to the baby.
Storage And Organization Ideas for Baby Food Pouches And Jars
Regarding baby food storage, there are so many options on the market.
I froze big batches in ice cube trays and then put the ice cubes in freezer-safe Ziploc bags.
Pro Tip: I used Glad Press N’ Seal to cover my ice cube trays and prevent spills in the freezer.
|
WeeSprout Makes Baby Food Easy

|

|
|
Primary Rating:
3.5
|
Primary Rating:
3.5
|
|
$14.98
|
$25.98
|
|
Description: I love that this tray has a 15 oz total capacity. This is more than your standard icecube tray. The soft silicone makes it easy to remove the food from the tray once froze. Bonus: The lid will prevent spills in the freezer. |
Description: My goal for this year is to rid my house of plastic storage containers and eating ware. These glass containers are:
|
I love that this tray has a 15 oz total capacity. This is more than your standard icecube tray. The soft silicone makes it easy to remove the food from the tray once froze.
Bonus: The lid will prevent spills in the freezer.
My goal for this year is to rid my house of plastic storage containers and eating ware.
These glass containers are:
- The perfect size
- Dishwasher safe
- Can be written on with dry erase markers
When To Introduce Solids To Your Baby
The CDC and The American Academy Of Pediatrics (AAP) recommend introducing and starting babies on solid foods around six months old.
Because each baby is different, following these steps and cues is important to decide when the baby should start eating.
- Talk with your pediatrician. At your 4 and 6-month checkups, your pediatrician can discuss whether your baby is ready to start solid foods, which foods to start with, how much, and how often.
- Your baby can sit with little or no support.
- Your baby has good head control.
- Your baby opens their mouth and expresses interest in food when it is offered.
You can use purees, do baby-led weaning, or combine both methods when offering solid foods.
How Much Should You Feed Your Baby?
I might sound like a broken record, but if you aren’t sure, check with your pediatrician.
Once you get the go-ahead to start solids, give your baby 1-2 tablespoons of food 1-2 times a day until their tummy adjusts.
Gradually, your baby will drink less formula or breast milk and eat more solid foods.
Each baby is different.
After that, try to get your baby on the same meal schedule as the rest of the family:
Breakfast, lunch, snack, and dinner.
Let your baby tell you when they are full! Don’t try to force your baby to take extra bites of food. Let them listen to their bodies and decide whether or not to eat more.
On the flip side, if you finish your bowl of 2 tablespoons and your baby seems to want more (reaching for the spoon, fussing, opening their mouth, etc.), go ahead and get them more.
Which Baby Foods To Feed Baby By Age: A List Of Fruits And Vegetables
The American Academy Of Pediatrics and the CDC do not have an official recommendation for which foods to introduce or which order.
Below are some guidelines from research I found on Baby’s First Foods, this Foods For Baby Chart, and an Age-By-Age Feeding Chart.
You could also ask your pediatrician which foods they would recommend starting first.
To be clear, the order of the foods listed below is just a suggestion; there is no specific order for the foods you give your baby.
It is how you prepare the food that is the most important!
Reminder: You should prepare your baby’s food according to their age and skills.
6 months and under: Stage 1 Baby Food
7-8 months (after Stage 1 is mastered): Stage 2
9-12 months (after Stage 2 is mastered): Stage 3
12+ months (after Stage 3 is mastered): Stage 4
- Fruits: Banana, apple, avocado, pears.
- Vegetables: green beans, sweet potato, butternut squash, lentils.
- Other: single-grain cereals (rice, oats, barley, etc.), chicken.
- Fruits: apricots, mango, nectarines, peaches, plums, prunes.
- Vegetables: carrots, parsnips, pumpkin, peas, squash (zucchini).
- Other: plain yogurt, pork, beef.
- Fruits: Blueberries, cantaloupe, cherries, citrus*, coconut, cranberries, figs, grapes, kiwi, papaya, persimmons, strawberries.
- Vegetables: asparagus, broccoli, beans, beets, cucumber, eggplant, leeks, onions, peppers, potatoes, spinach, tomatoes
- Other: pasta, cheese
*Can be hard on little tummies.
Baby Food Allergies
It is important to introduce foods one at a time to your baby in case of allergies.
You should consult with your pediatrician and make a plan for introducing allergenic foods.
These common allergens are:
- Milk
- Eggs
- Peanuts
- Tree nuts
- Fish
- Shellfish
- Soy
- Wheat
I was more cautious than most when introducing new foods and would only offer one new food every seven days to be able to detect an allergic reaction.
After about a month, I started introducing foods closer together, around 4-5 days apart.