Why Do You Need To Sterilize Breast Pump Parts?
Cleaning and sterilizing breast pump parts is necessary, especially in the early newborn phase. Even though breast milk is the best food for your newborn, germs and bacteria can grow when left out at room temperature.
To prevent spreading harmful germs and bacteria to your baby, sanitize your breast pump parts regularly. The Centers for Disease Control (CDC) recommends sterilizing your breast pump parts for extra protection while your child’s immune system develops, specifically in the first 2 months of life.

This post contains affiliate links. I may earn a small commission if you purchase something through one of these links. As an Amazon Associate, I earn from qualifying purchases. Thank you for the support!
I breastfed my son until he was 20 months old. I pumped until he was around 12 months old. I sterilized my pump parts once a day while I was pumping because I felt that was best for his immune system.
As a mom who has tried *almost* all of the methods listed below, I will tell you exactly how to sterilize breast pump parts and tell you which method worked the best for me.

How Often Do You Need To Sterilize Pump Parts?
You must clean your breast pump parts after each pumping session, but you don’t necessarily need to sterilize them each time. The CDC guidelines recommend sterilizing your pump parts at least once a day.
My general rule of thumb was once a day OR if I didn’t clean the pump parts right after using them. For example, if after I pumped, the dirty pump parts sat for an hour or more before I cleaned them, then I would sterilize them.
Pro Tip: Some pumps have many parts to sterilize, and some have few. You should decide whether you want a manual or electric pump (or something completely different like a Haakaa). I owned a manual pump, an electric pump, and a Haakaa.
Cleaning And Sterilizing Your Breast Pump For The First Use
Before using your breast pump for the first time, you must clean and sanitize all its parts. It’s a good idea to read the instruction manual that came with your pump so you know exactly how to do this. Do not clean or sanitize the pump motor!
In the future, you only have to clean the pump parts that come in contact with breast milk.

Breast Pump Parts That Come In Contact With Breastmilk
Each breast pump kit is different and has different parts, so you should read the manufacturer’s instructions that come with the pump to know which parts need to be cleaned after every use.
Pro Tip: Always have a few spare parts for your pump handy.
As a mom whose dog chewed up a valve, dropped a flange right into open flames when boiling, and waited impatiently for my sterilized parts to dry, it is worth having a few spare parts handy for when you have a hungry baby and unexpected things occur.
Here are some of the parts that come in contact with breast milk that you might have:
- Flanges
- Valves
- Membranes
- Connectors
- Breast milk bottles
Parts That Don’t Come In Contact With Breastmilk
In most cases, the following parts do not come into contact with breastmilk, so they do not need to be cleaned:
- Pump motor (electric pump)
- Pump handle (manual pump)
- Breast pump tubing *
- Backflow protectors *
*Almost all modern breast pumps are closed systems, meaning the milk doesn’t go through the tubes. Hospital-grade breast pumps are also closed systems. I recommend opting for the most sterile pumping for a closed system like the Spectra S2 (the model I used).
Backflow protectors typically don’t come in contact with breastmilk; however, they can get moisture occasionally. Read your pump’s manual to know what to do if you see moisture in your tubing or backflow protectors.
How To Clean Breast Pump Parts
Cleaning breast pump parts can be done in the sink or the dishwasher.
In the sink:
I highly recommend using a separate wash basin for bottles and pump parts. The whole time my son used bottles, the left side of our sink was only for bottles, pump parts, and warm, soapy water. I suggest this because the grease, grime, and bacteria that might transfer from other dishes to your bottles will be tricky to remove.

Fill your kitchen sink with hot, soapy water. Use a special bottle-soap designed to remove milk residue. In my experience, normal dish soap doesn’t get all the milk off the parts and leaves a breast milk residue behind.
Use a bottle brush to clean the parts and set them on a drying rack. My favorite drying rack is the Boon Drying Rack because you can customize it to the exact pump and bottle parts you use.

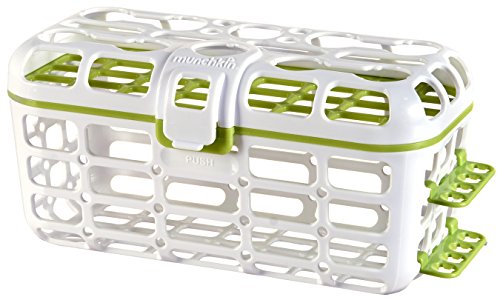
In the dishwasher:
Make sure your pump parts are dishwasher safe.
I recommend using a pump-part dishwasher basket to prevent small pieces from getting lost/melted in the dishwasher.
Quick clean wipes:
If you don’t have access to a sink but need to clean your pump parts (for example, in between pumping sessions at work), you can use a special breast pump disinfectant wipe so you don’t need to rinse after using it.
Do not use regular disinfectant wipes because they will leave harmful chemicals contaminating the breast milk.
How To Sterilize Breast Pump Parts
Before sterilizing your breast pump parts, you have to clean the pump parts thoroughly (see above).
There are many options for sterilizing breast pump parts. I’ll describe the methods and products I used and tell you which was easiest.

Steaming
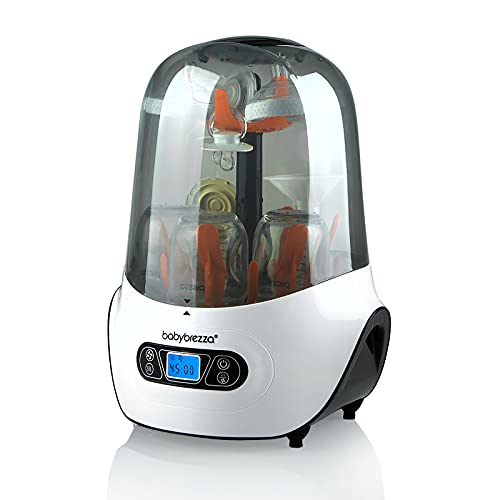
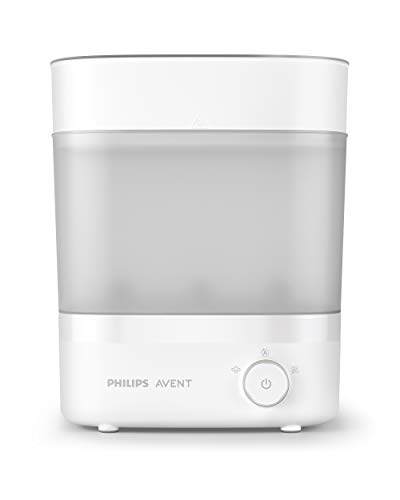
You can buy a breast pump steam sterilizer in the microwave or countertop.
- Microwave sterilizers: Load the pump parts in the bottom, add a little water, put the lid on, and microwave according to the directions. While microwave sterilizers save counter space, they usually can’t hold as many pump parts as a countertop sterilizer.
- Countertop sterilizers: Load the pump parts in the basin, add water to a tray, put the lid on, and hit the start button. They typically take 5 to 15 minutes to run.
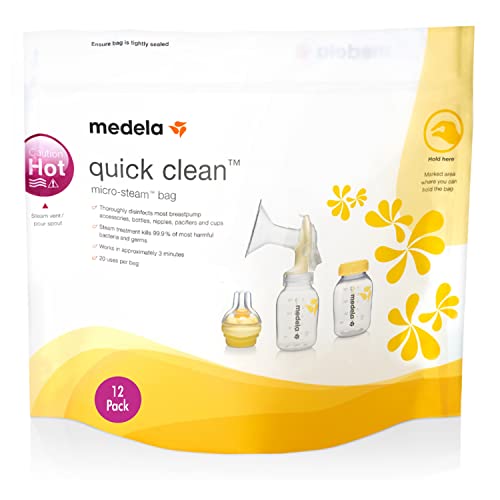
- Micro-steam bags: If you only need to steam a few parts or steam on the go, you can use micro-steam bags. I. Love. These. Bags. They are inexpensive and can be used 20 times each. The only downside is that you can only fit one set of flanges or collection bottles simultaneously.
Pros and Cons of Steam Sterilizing
✅ Pros: This is the fastest method because you don’t have to wait for the water to boil.
❌ Cons: Most basic steam sterilizers will leave tiny water droplets all over your pump parts that will take 24 hours or longer to air dry. I found the drying time too much for steam sterilizing and returned my counter steamer.
Pro Tip: After sterilizing your pump parts, let them air dry. Drying the parts with a towel or cloth could reintroduce bacteria.
More advanced steam sterilizers have a dryer built-in. These are a great option for drying your parts quickly.
Had I realized how much time I would spend putting pump parts on a drying rack and waiting for them to dry, I probably would have returned my basic sterilizer for one of these more advanced models with built-in dryers.
Maybe I will splurge on one of these for baby number two!
Dishwasher
If your dishwasher has a “sterilize” setting, you can sterilize your pump parts! My dishwasher is a newer model that doesn’t have a heated drying cycle, so there is no sanitizing setting ?.
If there were a “sanitize” setting, this would have been my preferred method- because you can clean and sterilize in one step!
Properly load your pump parts in the dishwasher to ensure they are thoroughly cleaned and sterilized. A special closed-top basket that is designed for this purpose works great.
Check the manufacturer guidelines for using a dishwasher, as most will recommend only using the top rack of your dishwasher.
UV Sterilizer
UV sterilizers are not common because they are expensive, there aren’t many options, and they take 60 minutes or longer to sterilize.
If you’re set on UV, the best product I found was the Tommee Tippee Ultra UV 3-in-1 Sterilizer.

Boiling Water
This seems like such an obvious option (so retro!), but boiling water is a preferred sterilizing method. This is my favorite way to sterilize breast pump parts and bottles. It is inexpensive (even free if you already have a pot). You can clean all your bottles and parts simultaneously instead of continuously cleaning them in batches.
Pro Tip: Buy an inexpensive stockpot that can fit many bottles, binkies, toys, pump parts, and anything else you might need to sterilize for a newborn all at once.
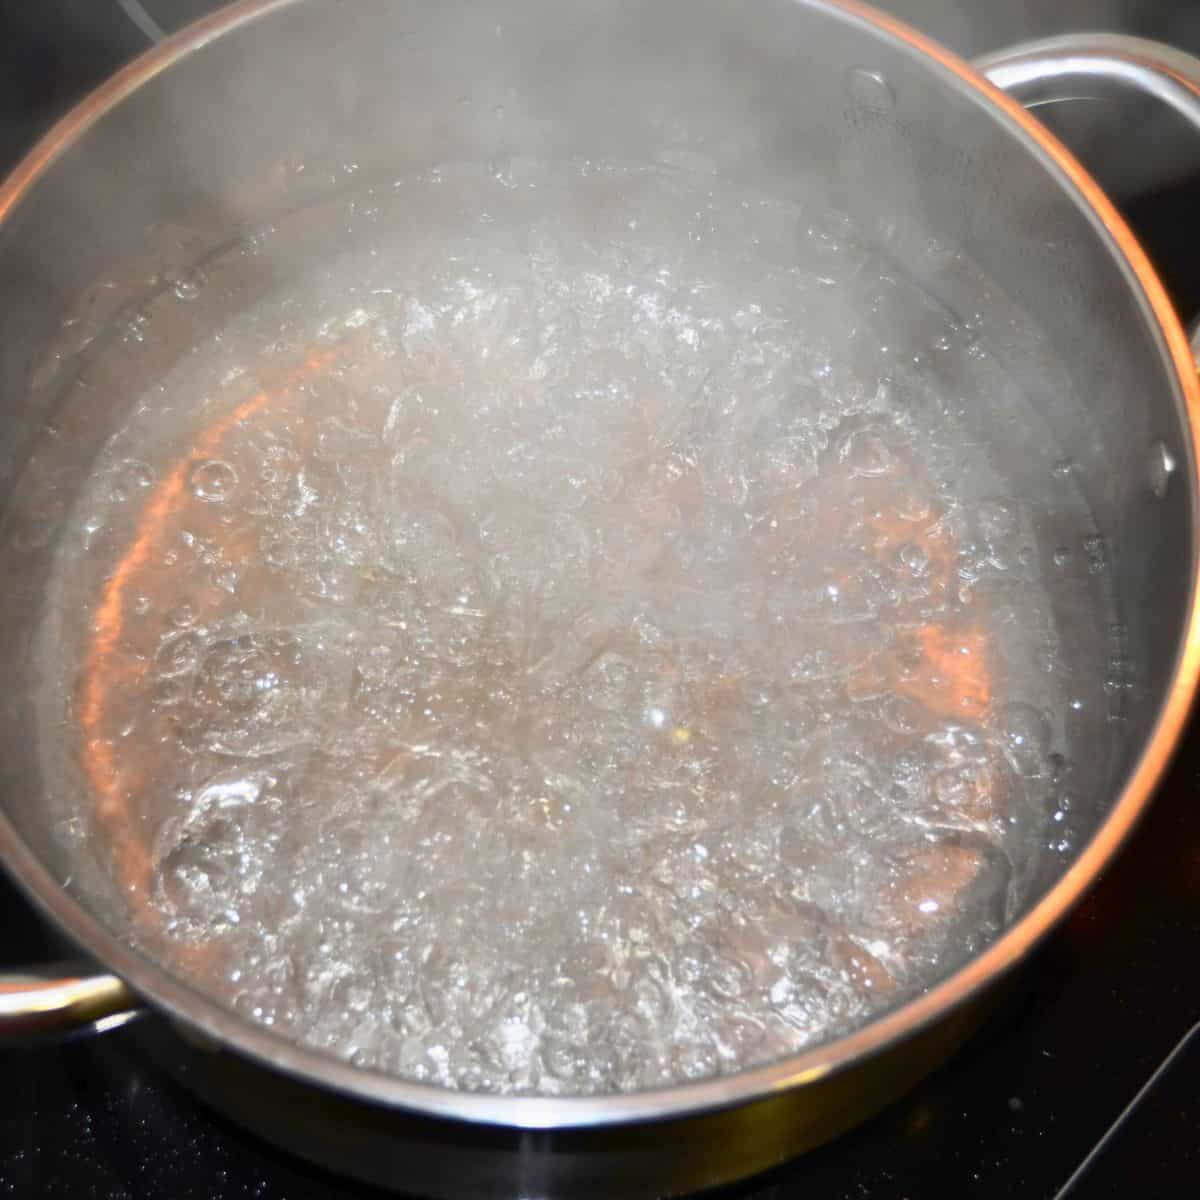
- Bring a large pot of water to a rolling boil.
- Add all of your parts to the pot and boil for 10 minutes.
- Use sterile or clean tongs to remove them and place them on a drying rack.
Pro Tip: Using tongs with silicone tips will make removing pump parts from the water much easier without them slipping everywhere.
Sterilizing Sprays
Medela has a sanitizing spray that kills germs in 60 seconds with one spritz and doesn’t need to be rinsed! There are no harsh chemicals so you can even use them on bottles and nipples.
The spray is super convenient for sterilizing on the go.
I recommend having this spray in your diaper bag for sterilizing emergencies. And in your pumping bag for sterilizing on the go.
This isn’t a method that I personally used (it wasn’t available when I was pumping), so I’m not sure how cost-effective it is/ drying time/ etc. But it is definitely something I will have in my arsenal for when this second baby gets here!
Drying Your Parts After Sterilizing
Drying your pump parts is one of the most frustrating components of the sterilizing process, IMO. You have to let your pump parts air dry after sterilizing. After sterilizing, you can’t use a cloth or paper towel to dry your pump parts because these could reintroduce bacteria.

Below is the approximate time that it takes to sterilize and dry your pump parts for each sanitizing method:
- Dishwasher: 45-120 minutes (depending on the length of your cycle). Bonus: This method also cleans your parts!
- Steam Sterilizers (No Dryer): 24-36 hours ?. Yup, you heard me, mama! Those pesky water droplets will still be there tomorrow and possibly the day after.
- Steam Sterilizers (With Dryer): 5-15 minutes?. Look at the manufacturer details for each model for sanitizing and drying times.
- Microwave Steam Sterilizer And/Or Microwave Sterilizer Bag: 15-20 minutes IF you take the pump parts out of the sterilizer bag or container and immediately put them on a drying rack (while they are still piping hot).
- Boiling: 30-45 minutes. Boiling the water is the longest part of the process, and boiling times will change depending on how much water you use and what kind of stove you have.
Pro tip: Remove your pump parts from the boiling water and shake them with tongs before transferring them to a drying rack. Shaking off excess droplets will help the parts dry faster.
How To Sterilize At Work Or On The Go
If you need to sterilize while you are at work or away from home, here are two options:
- Sink Method: If you can access a sink and microwave, you can wash your parts and put them in a reusable microwave sterilizer bag.
- No Sink: If you do not have access to water or a microwave, you can clean your breast pump parts using special disinfecting wipes. DO NOT use regular disinfecting wipes, as they can contaminate your milk with dangerous chemicals.